
Introduction
Car interior modifications have become a popular trend among automotive enthusiasts looking to enhance their vehicle’s appearance and create a more personalized feel. One of the most effective and stylish ways to transform your car’s interior is by wrapping your interior trim. Whether you’re aiming for a sleek, modern look or a bold design statement, wrapping the interior trim is a cost-effective, easy-to-apply solution that offers a lot of potential.
In this comprehensive guide, we’ll dive into every aspect of wrapping your car’s interior trim, covering materials, installation, benefits, and maintenance. We’ll also answer the most commonly asked questions and provide tips to ensure your interior vinyl wrap lasts as long as possible. By the end of this guide, you’ll have all the knowledge you need to take your car’s interior to the next level.
Key Takeaways
- Wrapping car interior trim enhances appearance and protects surfaces.
- Vinyl wraps come in various finishes, including matte, gloss, and carbon fiber.
- DIY installation is possible with the right tools and preparation.
- Regular cleaning and care will prolong the lifespan of your vinyl wrap.
- Always choose high-quality materials for durability and aesthetic appeal.
What is Car Interior Trim Wrapping?
Car interior trim wrapping is the process of applying a vinyl film to various components inside your vehicle, such as the dashboard, door panels, center consoles, and trim accents. This method allows for significant aesthetic changes without needing to replace the entire component. It’s especially popular for enthusiasts looking to upgrade their interior without the high cost of new parts or full interior customization.
The process is relatively straightforward: a vinyl film is applied to the surface of the trim, and then it’s molded to fit the contours of the object. The vinyl is heat activated to ensure a tight, seamless fit, which is key for a professional, high-quality finish.
Benefits of Wrapping Car Interior Trim
- Cost-Effective Customization: Wrapping your trim is far less expensive than replacing parts with premium materials. It’s an affordable way to transform the look of your car’s interior.
- Protection: A vinyl wrap serves as a protective layer that can guard against scratches, stains, and UV damage, preserving the integrity of your original trim.
- Variety of Finishes: Whether you want a matte, gloss, satin, or carbon fiber finish, vinyl wraps offer endless possibilities for customization.
- Easy Removal: Unlike traditional paints or permanent modifications, vinyl wraps can be removed easily without damaging the underlying trim, making it a great choice for temporary customizations or leasing vehicles.
Choosing the Right Vinyl Wrap Material
When it comes to wrapping your car’s interior trim, choosing the right vinyl material is crucial for both aesthetic appeal and durability. Here are the top options:
- Gloss Vinyl: Perfect for a sleek, high-shine finish that enhances colors and details.
- Matte Vinyl: Offers a more understated, modern look with a smooth, non-reflective surface.
- Satin Vinyl: A subtle mix between gloss and matte, providing a soft sheen without being too flashy.
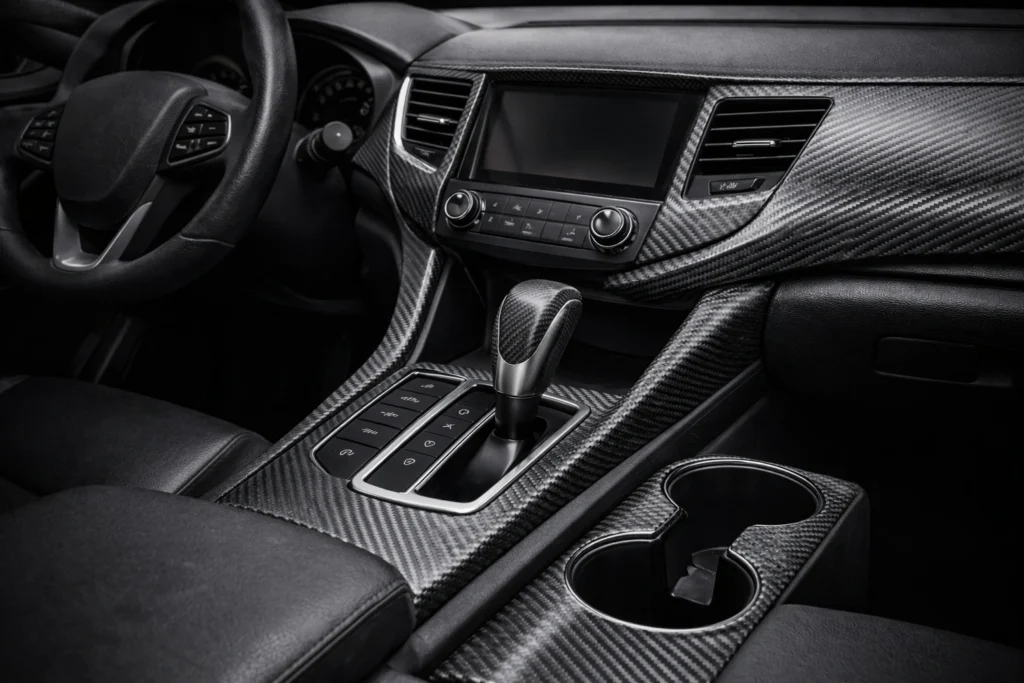
- Carbon Fiber Vinyl: Popular for a sporty, high-tech appearance, commonly used for dashboard and console wraps.
How to Wrap Car Interior Trim: Step-by-Step Guide
Step 1: Gather the Right Tools
Before you begin, ensure you have the proper tools. At a minimum, you’ll need the following:
- Vinyl wrap film
- Utility knife
- Squeegee or application tool
- Heat gun or hairdryer
- Cleaning supplies (soap, water, microfiber cloth)
Step 2: Clean the Surface
The key to a flawless vinyl wrap is clean surfaces. Use soap and water to remove any dirt or grease from the trim. Dry the area completely with a microfiber cloth to avoid trapping moisture under the vinyl.
Step 3: Measure and Cut the Vinyl
Carefully measure the area you plan to wrap. Cut the vinyl slightly larger than the surface to allow for adjustments.
Step 4: Apply the Vinyl
Peel back the backing paper from the vinyl and start applying it to the trim. Use a squeegee to press the vinyl onto the surface, making sure to eliminate any air bubbles.
Step 5: Heat and Mold the Vinyl
Use a heat gun or hairdryer to heat the vinyl, making it pliable. Gently stretch the vinyl over the trim, making sure to follow the contours. Apply heat to ensure a smooth, tight fit.
Step 6: Trim Excess Vinyl
Use a utility knife to trim off the excess vinyl around the edges. Be careful not to damage the trim underneath.
Step 7: Allow to Settle
Let the vinyl cool and settle into place. You may need to apply more heat to certain areas to ensure a perfect finish.
Common Mistakes to Avoid When Wrapping Car Interior Trim
- Skipping Surface Prep: Not cleaning the trim properly before applying the vinyl is one of the most common mistakes. Dirt, oils, and residue can cause the vinyl to peel or wrinkle over time.
- Using Low-Quality Vinyl: Cheap vinyl may look good initially but tends to fade or peel faster. Always choose high-quality brands like [Vinyl Wrap Pro] for better results and longevity.
- Incorrect Heating: Applying too much or too little heat can result in an uneven application or damage the vinyl.
- Not Allowing Enough Dry Time: Rushing the installation process can result in poor adhesion. Always give the vinyl time to settle and bond securely.
How Long Does an Interior Vinyl Wrap Last?
The lifespan of an interior vinyl wrap depends on various factors, including the quality of the vinyl, the climate, and how well it’s maintained. Typically, high-quality vinyl can last anywhere from 3 to 5 years. However, with proper care and maintenance, some wraps may last even longer. To learn more about the longevity of vinyl wraps, check out our guide on interior vinyl wrap lifespan.
Vinyl Wrap Maintenance Tips
- Clean Regularly: Regular cleaning with mild soap and water will prevent the build-up of grime and preserve the wrap’s appearance. Avoid using harsh chemicals that can damage the vinyl.
- Avoid Direct Sunlight: While vinyl wraps are UV-resistant, prolonged exposure to direct sunlight can cause fading. Parking in the shade or using sunshades can help extend the life of your wrap.
- Address Damage Promptly: If your wrap becomes scratched or damaged, address it quickly to prevent further issues. Minor repairs can be done easily with heat and vinyl patches.
- Reapply if Necessary: Over time, your wrap may start to show signs of wear. If this happens, it’s better to reapply the vinyl than let the damage spread.
Vinyl Wrap FAQs
Yes, with the right tools and patience, wrapping your car interior trim is a doable DIY project. Just make sure to follow the proper steps and use high-quality vinyl.
The cost of wrapping car interior trim varies depending on the material, the size of the area, and whether you do it yourself or hire a professional. DIY wraps can cost around $100-$300, while professional services may range from $500 to $1,500.
Yes, vinyl wrap is designed to withstand normal wear and tear. For a more detailed look at durability, check out our article on is vinyl wrap durable?.
Yes, one of the benefits of vinyl wraps is that they can be removed without damaging the underlying trim, making them perfect for temporary or custom designs. See how to remove vinyl wrap safely?
The best finishes depend on your personal style. Gloss finishes give a sleek look, while matte and satin wraps provide a more subtle, sophisticated appearance. Carbon fiber is also a great option for a sportier look.
To remove vinyl wraps, heat the vinyl gently with a heat gun, then peel it off slowly. Use a plastic scraper to remove any adhesive residue.
Wrapping the interior trim of a car usually takes between 4 to 8 hours, depending on the complexity of the job and the size of the area. Read how long does interior vinyl wrap last?
Yes, but avoid using high-pressure washers or harsh chemicals. Hand washing is recommended to maintain the integrity of the wrap.
Final Thoughts
Wrapping your car’s interior trim is an easy, affordable way to give your vehicle a custom, high-end look. Whether you’re a seasoned car enthusiast or a first-time modifier, this guide has provided all the insights you need to get started. Remember, choosing the right materials, following the correct application steps, and taking care of your wrap will ensure a lasting, beautiful finish.
For the highest-quality materials and expert advice, Vinyl Wrap Pro is here to support your car customization journey. Check out our comprehensive range of vinyl wraps to take your car’s interior to the next level.